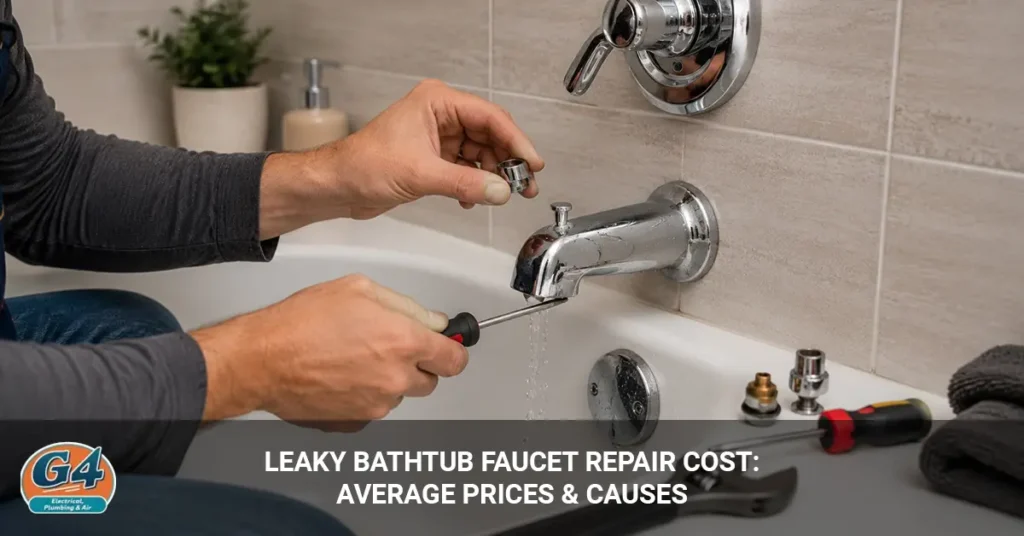
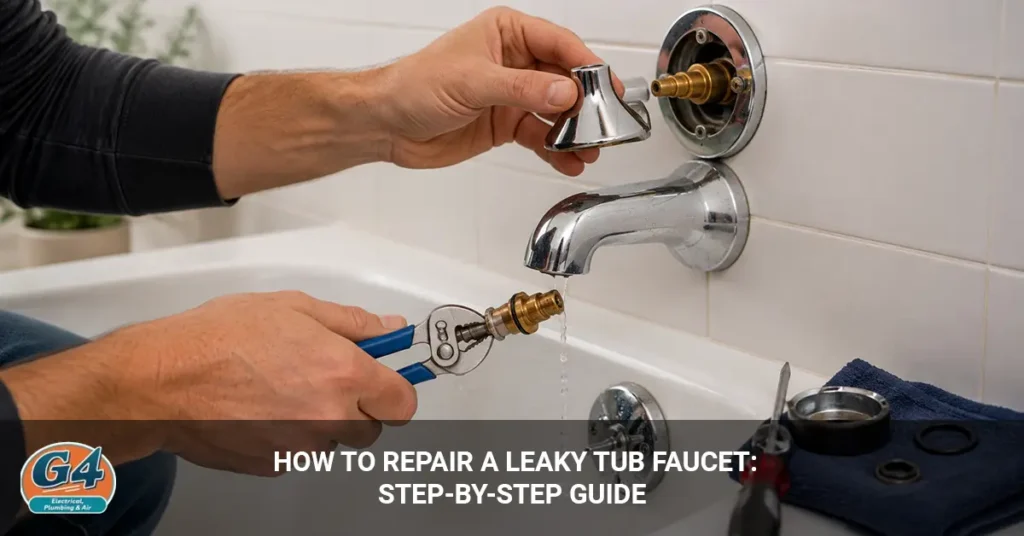
A leaky tub faucet can often be repaired by replacing a worn washer, cartridge, O-ring, or other internal seal. The exact repair depends on the type of faucet and where the water is leaking.
For a beginner, the basic process is simple: shut off the water, identify the faucet type, remove the handle, inspect the internal part, replace the damaged component, and test the faucet.
A dripping faucet is usually not an emergency, but don’t ignore it. A small leak can waste water continuously and may eventually damage the faucet or surrounding area.
What Causes a Tub Faucet to Leak?
A tub faucet usually leaks because an internal washer, cartridge, O-ring, valve, or seal has worn out or become damaged. For more common causes, see these faucet leaking causes.
The location of the leak can give you a clue about the problem.
Common causes include:
- Worn washer or rubber seal
- Bad faucet cartridge
- Damaged O-ring
- Worn valve or valve seat
- Mineral buildup
- Loose faucet parts
- Corrosion
- Damaged plumbing connections
Faucet Drips From the Spout When Turned Off
A faucet that keeps dripping from the spout when it’s turned off usually has a worn washer, cartridge, valve, or internal seal.
Older two-handle faucets often use washers and valve stems. Many single-handle faucets use a cartridge.
The right replacement part depends on the faucet design.
Water Leaks Around the Handle
Water leaking around the handle often points to a worn O-ring, cartridge seal, or valve-stem seal.
This type of leak can sometimes be fixed without replacing the entire faucet.
Water Leaks Around the Tub Spout
A leak around the tub spout can come from a loose connection, worn seal, or damaged spout.
If the spout itself is loose or corroded, tightening it may help. But if water is coming from behind the wall, the problem may be with the plumbing connection.
Water Comes From Behind the Wall
Water leaking from behind the tub faucet can indicate a damaged pipe or plumbing connection and usually needs professional attention. It may also indicate hidden plumbing leaks that can cause damage if left untreated.
Don’t keep taking the faucet apart if water is entering the wall.
A hidden leak can cause damage to drywall, framing, and other materials.
What You’ll Need to Repair a Leaky Tub Faucet
Most basic tub faucet repairs require a few common hand tools and the correct replacement part.
You may need:
- Screwdriver
- Adjustable wrench
- Allen wrench set
- Replacement washer, O-ring, cartridge, or valve component
- Plumber’s grease, when appropriate
- Cloth or towel
- Small container for screws and clips
You may not need every tool on this list. The faucet design determines what you’ll use.
How to Find the Correct Replacement Part
The easiest way to get the correct replacement part is to identify the faucet brand and model before buying anything.
Look for a brand name or model number on the faucet.
For cartridges, don’t rely on appearance alone. Different cartridges can look similar but have different dimensions and connections.
If possible, remove the old part and take it to a plumbing supply store to find a matching replacement.
How to Repair a Leaky Tub Faucet Step by Step
To repair a leaky tub faucet, shut off the water, remove the handle and internal component, replace the damaged part, and test the faucet for leaks.
Step 1: Turn Off the Water Supply
Turn off the water supply before taking the faucet apart.
The shutoff may be located near the tub or in another accessible area of the plumbing system.
If there’s no local shutoff, you may need to turn off the home’s main water supply.
Once the water is off, open the faucet briefly to release pressure from the line.
Don’t skip this step. Removing a faucet component while the water is still pressurized can create a much bigger leak.
Step 2: Identify Your Faucet Type
Identify the faucet type before removing parts because compression, cartridge, and other faucet designs use different internal components.
You may have:
- Two-handle compression faucet
- Single-handle cartridge faucet
- Ceramic-disc faucet
- Another manufacturer-specific design
You don’t need to understand every detail of the faucet mechanism.
You just need to identify which type you’re working with so you can get the correct replacement part.
Step 3: Remove the Faucet Handle
Remove the faucet handle carefully to access the valve, cartridge, or stem underneath.
Look for a screw under a decorative cap or on the side of the handle.
Remove the screw and pull the handle straight off if possible.
If the handle doesn’t move, don’t immediately start prying against the tub or wall. Older handles can become stuck because of corrosion.
A faucet handle puller may be needed for a stubborn handle.
Step 4: Remove the Cartridge, Stem, or Valve Component
Remove the internal component carefully and keep track of how it was positioned.
Depending on the faucet, you may need to remove:
- A retaining screw
- Retaining clip
- Nut
- Cartridge
- Valve stem
Take a quick photo before removing the part. It can help you remember the correct orientation during reassembly.
If the component is badly corroded or won’t come out with reasonable effort, stop rather than forcing it.
Step 5: Inspect the Old Part
Inspect the removed component for worn seals, cracks, corrosion, mineral buildup, or other visible damage.
Look for:
- Cracked rubber
- Flattened O-rings
- Worn washers
- Damaged cartridge surfaces
- Corrosion
- Mineral deposits
If the part looks damaged, replace it with the correct matching component.
If you’re unsure whether the part is causing the leak, compare it with the new replacement before installing anything.
Step 6: Replace the Damaged Part
Install the correct replacement washer, O-ring, cartridge, or valve component for your faucet model.
Follow the manufacturer’s installation instructions when available.
Make sure the component is positioned correctly.
If the replacement requires plumber’s grease, use it as directed. Don’t apply products where the manufacturer doesn’t recommend them.
Avoid overtightening screws, nuts, and connections. Excessive force can damage the faucet.
Step 7: Reassemble the Faucet
Reassemble the faucet in the reverse order you removed the parts.
Replace any retaining clips, screws, nuts, or other components.
Then reinstall the handle.
Make sure everything is secure, but don’t overtighten it.
Step 8: Turn the Water Back On and Test the Faucet
Turn the water back on slowly and check the faucet for dripping or other leaks.
First check the faucet with the handles turned off.
Then turn the water on and check:
- Around the handle
- Around the spout
- Around the faucet connections
- Behind the faucet if accessible
Let the faucet run for a short time and then turn it off again.
If the original drip has stopped, the repair was successful.
How to Fix a Tub Faucet That Drips From the Spout
A tub faucet that drips from the spout when turned off usually needs a new washer, cartridge, or valve component.
The faucet type can help narrow down the likely repair.
A two-handle compression faucet may need a washer or valve-stem repair.
A single-handle faucet commonly uses a cartridge, so replacing the cartridge may solve the problem.
Simply tightening the handle usually isn’t a permanent solution. If the internal seal is worn, the faucet will continue leaking.
How to Fix a Tub Faucet Leaking Around the Handle
A tub faucet leaking around the handle often needs a new O-ring, cartridge seal, or valve-stem seal.
Start by shutting off the water and removing the handle.
Inspect the visible seals and internal components.
If the O-ring is cracked or flattened, replace it with the correct size.
If the cartridge itself is damaged, replace the cartridge instead.
After reassembly, turn the water back on slowly and check around the handle.
What to Do If the Tub Faucet Handle Is Stuck
Don’t force a stuck tub faucet handle because excessive force can damage the faucet or the plumbing behind the wall.
First, check for a hidden retaining screw or decorative cap.
If the screw is removed but the handle won’t move, corrosion may be holding it in place.
A faucet handle puller can remove a stubborn handle without putting excessive pressure on the plumbing.
If the handle is badly corroded or you’re concerned about damaging the valve, it’s safer to call a plumber.
Common Mistakes to Avoid When Repairing a Tub Faucet
The most common DIY mistakes are failing to shut off the water, installing the wrong replacement part, overtightening components, and forcing corroded parts.
Avoid these problems:
- Don’t remove parts before shutting off the water.
- Don’t buy a cartridge based only on its appearance.
- Don’t lose retaining clips or screws.
- Don’t forget the orientation of the old component.
- Don’t overtighten the faucet.
- Don’t force a seized valve or cartridge.
- Don’t skip the final leak test.
- Don’t ignore water leaking behind the wall.
If the faucet continues to drip after you’ve replaced a component, see these common causes of a faucet dripping after replacement.
Taking a photo before disassembly can make reassembly much easier.
How Long Does It Take to Repair a Leaky Tub Faucet?
A simple tub faucet repair can take about 30 minutes to 2 hours, depending on the faucet type and how difficult the parts are to remove.
A washer or O-ring replacement may be fairly quick.
A cartridge replacement can take longer if the cartridge is stuck.
Old faucets can also take more time because corrosion may make the handle, cartridge, or valve difficult to remove.
If the leak involves plumbing behind the wall, the repair can become much more involved.
When Should You Stop DIY and Call a Plumber?
Call a professional for leaky faucet repair when the faucet is badly corroded, water is leaking behind the wall, a component won’t come out, or the leak continues after you’ve replaced the suspected part.
You should also get professional help if:
- You can’t shut off the water.
- The cartridge or valve is seized.
- The plumbing connection moves when you try to remove the faucet.
- You damage a pipe or fitting.
- Water is entering the wall.
- The faucet continues dripping after the repair.
- You can’t identify the correct replacement part.
- You’re uncomfortable working on the plumbing.
It’s better to stop than turn a small faucet repair into a damaged pipe or larger plumbing problem.
How Much Does It Cost to Have a Tub Faucet Repaired?
Professional tub faucet repair commonly costs about $100 to $400, depending on the failed part and the labor required.
A simple washer or seal replacement generally costs less than a cartridge replacement or full faucet replacement.
The cost can increase when:
- The faucet is badly corroded.
- Access is difficult.
- A specialty cartridge is required.
- The faucet needs full replacement.
- Plumbing behind the wall needs repair.
- Emergency service is required.
If you’re comfortable doing a simple repair yourself, the replacement part may be the only cost. For more complicated problems, professional repair can save you from damaging the faucet or plumbing.
Leaky Tub Faucet Repair FAQs
How do I fix a tub faucet that keeps dripping?
Replace the worn washer, cartridge, O-ring, or valve component causing the leak. Shut off the water first, identify the faucet type, replace the damaged part, and test the faucet after reassembly.
Why does my tub faucet drip when it’s turned off?
A tub faucet usually drips when a washer, cartridge, valve, or internal seal no longer creates a proper seal. The exact cause depends on the faucet design.
How do I know if my tub faucet cartridge is bad?
A bad cartridge can cause dripping when the faucet is off, leaking around the handle, or difficulty controlling water flow and temperature. Replacing the cartridge can solve the problem when the cartridge is worn.
How do I replace a tub faucet washer?
To replace a tub faucet washer, shut off the water, remove the handle and valve stem, replace the worn washer, and reassemble the faucet. This repair is most common on older compression-style faucets.
Can I replace a tub faucet cartridge myself?
Yes, many homeowners can replace a tub faucet cartridge if they can safely shut off the water and identify the correct replacement. A stuck cartridge or damaged valve is a good reason to call a plumber.
How do I remove a stuck tub faucet handle?
A stuck tub faucet handle may need a faucet handle puller if corrosion is preventing it from coming off. Avoid prying aggressively because you could damage the valve or plumbing behind the wall.
How long does it take to fix a leaky tub faucet?
A basic repair can take about 30 minutes to 2 hours. Corrosion, stuck components, difficult access, or hidden plumbing problems can make the repair take longer.
When should I call a plumber for a leaking tub faucet?
Call a plumber if the leak continues after replacing the suspected part, water is leaking behind the wall, or you can’t safely remove the faucet components.
Final Takeaway
Most leaky tub faucets can be repaired by replacing the worn washer, cartridge, O-ring, or other damaged internal component.
Start by figuring out where the water is coming from and identifying the faucet type. Then shut off the water before removing anything.
For a simple repair, the process is usually straightforward: remove the handle, inspect the internal part, replace the damaged component, reassemble the faucet, and test for leaks.
Don’t force stuck or corroded parts. If water is leaking behind the wall or the repair isn’t going as expected, call a plumber before a small faucet leak becomes a much larger plumbing problem.