
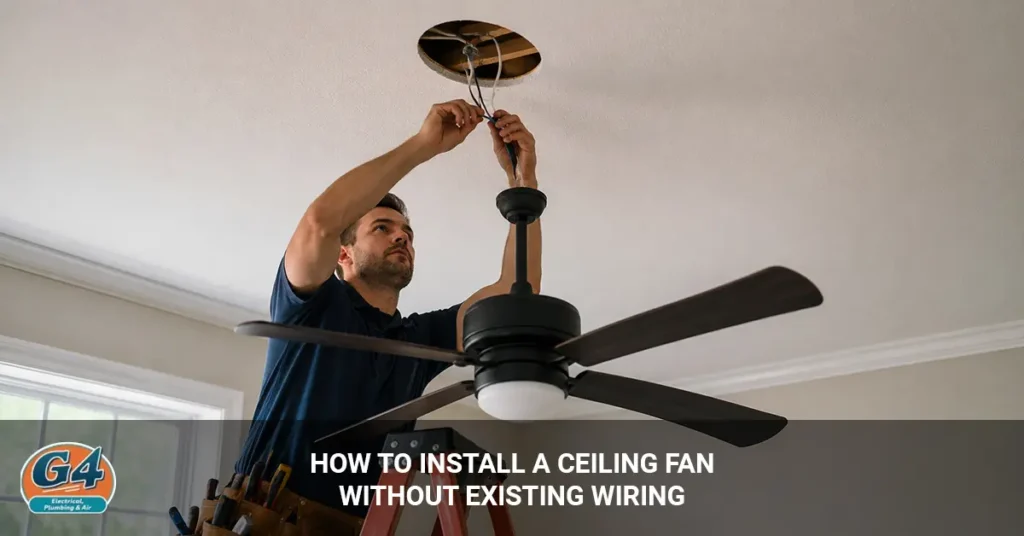
Installing a ceiling fan without existing wiring is possible, but it requires running new electrical wiring and installing a fan-rated electrical box. Some homeowners can handle simple installations themselves, but projects involving new wiring may become more difficult and are often safer for a licensed electrician.
A ceiling fan can improve airflow, make rooms feel more comfortable, and help lower cooling costs during hot weather. However, proper installation is important because unsafe wiring or poor mounting can create electrical and fire hazards.
This guide explains how to install a ceiling fan without existing wiring, including the tools you need, wiring steps, safety tips, common installation problems, and when hiring an electrician may be the better option.
Can You Install a Ceiling Fan Without Existing Wiring?
Yes, you can install a ceiling fan without existing wiring, but you will need to run new electrical wiring and install a fan-rated electrical box. The process usually involves connecting the new fan to a nearby power source and adding a wall switch for safe operation.
While some homeowners handle simple installations themselves, projects involving new wiring can become more complex and may require a licensed electrician.
Yes, But New Wiring Is Required
A ceiling fan needs a proper electrical connection to operate safely. If there is no wiring in the ceiling, new electrical cable must be routed through the walls or ceiling to supply power to the fan and switch.
In most cases, electricians connect the new wiring to:
- A nearby light circuit
- An outlet circuit
- A switch box
- An existing junction box
A fan-rated electrical box is also required because standard light fixture boxes are not designed to support the weight and movement of a ceiling fan.
When This Project Is DIY-Friendly
Installing a ceiling fan without wiring may be manageable for experienced homeowners when the wiring path is simple and easy to access.
DIY installation is usually easier if:
- A nearby power source already exists
- The attic is easy to access
- The fan replaces a nearby light fixture
- No major drywall work is needed
- You have basic electrical experience
Simple installations with accessible wiring are generally safer and less time-consuming.
When You Should Hire an Electrician
Hiring an electrician is often the safer choice when the installation becomes more complex or involves older electrical systems.
Professional help is recommended for:
- Older homes with outdated wiring
- Electrical panel upgrades
- Complex wiring routes
- High or vaulted ceilings
- No attic access
- Uncertain electrical connections
A licensed electrician can also help ensure the installation meets local electrical and building codes.
Tools and Materials Needed to Install a Ceiling Fan
Installing a ceiling fan without existing wiring requires the right tools, electrical materials, and safety equipment. Having everything prepared before starting can make the installation safer, easier, and more efficient.
Essential Tools
Several basic electrical and installation tools are commonly needed to install a ceiling fan safely.
Common tools include:
- Voltage tester
- Power drill
- Screwdrivers
- Wire stripper
- Fish tape
- Ladder
- Stud finder
A voltage tester is especially important because it helps confirm the power is completely turned off before working with electrical wiring.
Materials You’ll Need
Installing a ceiling fan without wiring also requires electrical materials and proper mounting hardware.
Typical materials include:
- Ceiling fan
- Fan-rated electrical box
- Electrical cable
- Wire nuts
- Wall switch
- Mounting brace
- Electrical tape
A fan-rated electrical box is important because standard light fixture boxes are not designed to support the movement and weight of a ceiling fan.
Safety Equipment
Safety equipment helps reduce the risk of injury during installation, especially when working with electrical wiring or cutting into ceilings and walls.
Recommended safety equipment may include:
- Safety glasses
- Work gloves
- Dust mask
- Flashlight
Using proper safety gear can help protect against dust, falling debris, and accidental electrical contact.
Important Safety Steps Before Starting
Electrical safety should always come first when installing a ceiling fan. Taking the right precautions before starting can help prevent electrical shock, wiring damage, and fire hazards.
Turn Off Power at the Breaker
Always turn off the power at the circuit breaker before touching any electrical wiring. This is one of the most important safety steps because it helps reduce the risk of electrical shock during installation.
After turning off the breaker, avoid relying only on the wall switch since wires may still carry electricity.
Test Wires With a Voltage Tester
Use a voltage tester to confirm the wires are not live before beginning any electrical work. Even after shutting off the breaker, testing the wires adds an extra layer of safety.
Never touch exposed wires until the voltage tester confirms the power is completely off.
Check Local Electrical Codes
Some cities and local building departments require specific wiring methods, electrical boxes, or installation procedures for ceiling fans.
Checking local electrical codes before starting can help avoid safety issues and failed inspections later.
Determine Permit Requirements
Installing new electrical wiring may require permits depending on local building regulations. Permit requirements are more common when adding new circuits or modifying existing electrical systems.
In many areas, licensed electricians handle permits and inspections as part of the installation process.
Use a Fan-Rated Electrical Box
Ceiling fans should always be mounted to a fan-rated electrical box. Standard light fixture boxes are not designed to support the weight and movement of a ceiling fan.
A fan-rated box helps keep the fan securely mounted and reduces the risk of electrical safety problems over time.
Choose the Best Location for the Ceiling Fan
Choosing the right ceiling fan location improves airflow, comfort, and installation safety. A properly placed fan can cool the room more effectively and help avoid clearance or mounting problems.
Ideal Ceiling Fan Placement
Most ceiling fans work best when installed near the center of the room. Center placement helps distribute air evenly throughout the space and improves overall airflow.
For larger rooms, choosing the correct fan size is also important for proper air circulation.
Minimum Ceiling Height Requirements
Most building codes require ceiling fan blades to be at least 7 feet above the floor for safety. Rooms with lower ceilings may need a low-profile or flush-mount ceiling fan.
High ceilings may require a downrod to position the fan at the correct height for better airflow.
Clearance From Walls and Furniture
Ceiling fan blades should usually have at least 18 inches of clearance from walls, cabinets, and nearby furniture. Proper spacing helps prevent blade damage and allows the fan to move air more efficiently.
Avoid placing the fan too close to tall furniture or room corners.
Access to Power Source
Installing the ceiling fan closer to an existing electrical source can simplify the wiring process and reduce installation costs. Shorter wiring runs usually require less labor and fewer ceiling or wall modifications.
Easy access to attic space or nearby electrical boxes can also make installation faster and safer.
How to Run Electrical Wiring for a Ceiling Fan
Running new electrical wiring is one of the most important parts of installing a ceiling fan without existing wiring. Safe wiring helps ensure the fan operates properly and meets electrical code requirements.
Locate the Nearest Power Source
Most ceiling fans are connected to a nearby electrical source to provide power safely and efficiently. Electricians commonly connect ceiling fan wiring to:
- Existing light circuits
- Nearby outlets
- Switch boxes
- Junction boxes
Choosing a nearby power source can reduce wiring distance, labor time, and installation costs.
Cut Openings for Wiring Access
Small openings may need to be cut into the ceiling or drywall to route electrical cable safely. These openings allow access to wall cavities, attic spaces, or ceiling joists where the wiring will run.
Careful planning can help minimize drywall damage and reduce repair work later.
Run Electrical Cable Through the Ceiling
Electrical cable is usually routed through attic spaces, ceiling joists, or wall cavities to reach the new fan location. In some homes, electricians may need to drill small holes through framing to guide the wiring safely.
The wiring path should follow local electrical code requirements and avoid sharp bends or damaged areas.
Use Fish Tape for Tight Spaces
Fish tape helps pull electrical wiring through hard-to-reach wall and ceiling spaces. This tool is especially useful when working inside finished walls or narrow ceiling cavities.
Using fish tape can make wiring installation faster and reduce unnecessary wall damage.
Secure the Wiring Properly
Electrical wiring must be properly secured and protected during installation. Loose or exposed wiring can create safety hazards and may violate electrical codes.
Most electrical codes require wiring to be fastened correctly and protected from sharp edges, moisture, or physical damage.
Install the Ceiling Fan Electrical Box
Installing a strong electrical box is one of the most important parts of ceiling fan installation. The electrical box supports the fan’s weight and movement, helping keep the fan secure and safe over time.
Why Fan-Rated Boxes Matter
Fan-rated electrical boxes are specifically designed to support the weight and vibration of a ceiling fan. Standard light fixture boxes are not built to handle the constant movement created by spinning fan blades.
Using the wrong type of box can cause the fan to loosen, wobble, or become unsafe.
Install a Ceiling Fan Brace
Heavy ceiling fans often require a ceiling fan brace installed between the ceiling joists for extra support. Adjustable braces help stabilize the electrical box and distribute the fan’s weight more evenly.
This is especially important for larger or heavier ceiling fans.
Secure the Electrical Box to the Ceiling Joist
The electrical box must be securely attached to a ceiling joist or fan brace to prevent movement, sagging, or vibration problems.
Loose mounting can lead to wobbling, noise, or unsafe fan operation over time.
Check Weight Support Requirements
Always confirm the electrical box is rated to support the ceiling fan’s weight. Some heavy fans require higher-rated support systems or reinforced mounting hardware.
Checking the weight rating before installation helps ensure the fan remains safely mounted for long-term use.
Install a New Wall Switch
Most ceiling fans need a wall switch for safe and convenient operation. Installing a dedicated switch allows you to control the fan and lighting without unplugging power or using only pull chains.
Single Switch vs Dual Switch Setup
A single switch setup controls both the fan and light together from one switch. This is the simpler and more common option for basic ceiling fan installations.
A dual switch setup allows separate control of the fan and light kit. This setup gives homeowners more control over lighting and airflow but may require additional wiring inside the wall.
Wire the Switch Safely
Wall switch wiring should always follow local electrical codes and the ceiling fan manufacturer’s instructions. Incorrect switch wiring can lead to electrical problems, non-working controls, or safety hazards.
Before wiring the switch:
- Turn off power at the breaker
- Test wires with a voltage tester
- Match the wiring diagram carefully
- Secure all wire connections properly
If the wiring setup seems confusing or unsafe, hiring an electrician is usually the safer option.
Install the Switch Plate
After the wiring is completed, secure the wall switch inside the electrical box and install the switch plate cover.
Make sure the switch feels stable and the cover plate sits flush against the wall for a clean and safe finished appearance.
Wire the Ceiling Fan Correctly
Correct ceiling fan wiring is important for both safety and proper fan performance. Loose or incorrect wiring can cause electrical problems, fan failure, or even fire hazards if not handled properly.
Always follow the ceiling fan wiring diagram and local electrical code requirements during installation.
Connect Ground Wires
Ground wires help protect against electrical shock and should always be connected correctly. In most ceiling fan installations, the ground wire is either bare copper or green.
The fan ground wire should be connected securely to:
- The house ground wire
- The grounding screw on the electrical box when required
Never skip the grounding connection during installation.
Connect Neutral and Hot Wires
The neutral and hot wires must match the ceiling fan wiring diagram exactly. In most systems:
- White wires are neutral wires
- Black wires are hot wires
- Blue wires often control the light kit
Incorrect wire connections can prevent the fan from working properly or create electrical safety hazards.
Wire the Fan Light Kit
Ceiling fans with built-in lights require additional wiring for the lighting controls. Some fans allow separate control for the fan and light using dual wall switches or remote systems.
Carefully follow the manufacturer’s instructions when connecting the light kit wiring.
Secure Connections With Wire Nuts
Wire nuts help secure electrical connections and prevent loose wiring inside the electrical box. After twisting the wires together, tighten the wire nut securely and gently pull the wires to confirm the connection is stable.
Loose wire connections can cause flickering, overheating, or electrical failure.
Common Wiring Mistakes to Avoid
Several wiring mistakes can create safety risks or prevent the ceiling fan from working properly.
Common installation mistakes include:
- Reversed wiring
- Loose wire connections
- Missing ground wires
- Overloaded electrical circuits
- Incorrect wall switch wiring
If the wiring setup becomes confusing or the fan does not operate correctly, contacting a licensed electrician is often the safest solution.
Mount and Assemble the Ceiling Fan
Once the wiring is complete, the ceiling fan can be mounted and assembled safely. Proper assembly helps reduce wobbling, noise, and long-term mounting problems.
Always follow the manufacturer’s installation instructions for your specific ceiling fan model.
Attach the Mounting Bracket
The mounting bracket secures the ceiling fan to the electrical box and provides the main support for the fan assembly.
Make sure the bracket is tightly fastened to the fan-rated electrical box before attaching the fan motor. A loose bracket can cause wobbling or unsafe movement during operation.
Install the Fan Motor
The fan motor should be carefully attached to the mounting bracket according to the manufacturer’s instructions. Ceiling fan motors can be heavy, so it is important to support the motor properly during installation.
Avoid pinching or damaging the wiring while positioning the motor.
Attach Fan Blades
Fan blades should be attached evenly and tightened securely to help reduce wobbling and balance issues. Tighten all blade screws carefully, but avoid overtightening since this can damage the blade arms.
Uneven blade installation is one of the most common causes of fan vibration.
Install the Light Kit
If the ceiling fan includes a light kit, connect the light wiring and secure the light fixture components according to the installation instructions.
Make sure all light connections are properly tightened before installing bulbs or light covers.
Secure All Screws and Connections
Before restoring power, double-check all screws, mounting brackets, blade arms, and electrical connections. Loose hardware can create noise, wobbling, or electrical problems later.
Taking a few extra minutes to inspect the installation can help prevent future safety and performance issues.
Test the Ceiling Fan After Installation
Testing the ceiling fan after installation helps confirm the fan operates safely, smoothly, and correctly. Checking the system before regular use can help catch wiring or mounting problems early.
Restore Power at the Breaker
Once the installation is fully complete, turn the power back on at the circuit breaker. If the breaker trips immediately, turn the power back off and inspect the wiring connections before testing the fan again.
Never test the fan with exposed wiring or loose electrical connections.
Test Fan Speeds and Lighting
Check all fan speed settings, lighting controls, pull chains, wall switches, and remote functions to make sure everything works properly.
If the fan includes a light kit or smart controls, test each feature individually to confirm proper operation.
Check for Wobbling or Noise
A properly installed ceiling fan should run smoothly with minimal movement or noise. Slight wobbling may happen at first, but excessive shaking usually means the blades need balancing or the mounting hardware needs tightening.
Buzzing, clicking, or rattling sounds may also indicate loose screws or wiring problems.
Confirm Proper Airflow Direction
Most ceiling fans include a direction switch that changes the blade rotation for summer and winter use.
During summer, the blades should rotate counterclockwise to create a cooling breeze. During winter, many homeowners reverse the direction to help circulate warm air more evenly throughout the room.
Common Problems During Ceiling Fan Installation
Some ceiling fan problems may appear during or after installation, especially if the wiring, mounting, or balancing is not done correctly. Identifying these issues early can help prevent electrical problems, noise, or unsafe fan operation.
Fan Won’t Turn On
A ceiling fan that will not turn on is often caused by wiring or power connection problems.
Common causes include:
- Loose wiring
- Tripped circuit breakers
- Incorrect switch wiring
- Faulty electrical connections
- Loose wire nuts
Before troubleshooting, always turn off the power at the breaker and test the wiring safely.
Fan Wobbles Excessively
Excessive wobbling is usually caused by uneven fan blades, loose screws, or improper mounting. Even small installation mistakes can cause the fan to shake while running.
In many cases, tightening the blade screws or using a balancing kit can help reduce wobbling.
Lights Not Working
Ceiling fan lighting problems are commonly linked to wiring or switch issues.
Possible causes include:
- Incorrect wiring
- Loose light bulbs
- Faulty wall switches
- Loose light kit connections
- Damaged light sockets
Carefully checking the light kit wiring and switch connections can often solve the problem.
Breaker Keeps Tripping
A breaker that trips repeatedly may indicate overloaded circuits, damaged wiring, or electrical short circuits. This problem should never be ignored because it may create overheating or fire risks.
If the breaker continues tripping after installation, the wiring should be inspected by a licensed electrician.
Buzzing or Humming Sounds
Buzzing or humming noises may result from loose electrical connections or other buzzing electrical issues.
Sometimes the noise can be reduced by tightening screws and checking blade balance. If the sound continues, the motor or electrical wiring may need professional inspection.
How Much Does It Cost to Install a Ceiling Fan Without Existing Wiring?
Installing a ceiling fan without existing wiring usually costs more because new electrical wiring, switches, and mounting hardware must be installed. The total cost depends on the wiring difficulty, ceiling height, labor rates, and whether electrical upgrades are needed.
Most homeowners spend between $350 and $1,000 or more for professional installation with new wiring.
DIY Installation Costs
DIY ceiling fan installation materials usually cost between $100 and $500, depending on the fan type and the tools already available at home.
DIY costs may include:
- Ceiling fan price
- Electrical wiring
- Wire connectors
- Mounting hardware
- Fan-rated electrical box
- Basic electrical tools
Higher-end ceiling fans or specialty mounting equipment can increase the total cost.
Professional Electrician Costs
Professional ceiling fan installation without existing wiring typically costs between $350 and $1,000 or more. The final price depends on labor time, wiring complexity, and how difficult it is to access the ceiling or walls.
Homes with older wiring or difficult installation conditions may cost more.
Cost of New Wiring
Running new electrical wiring for a ceiling fan usually adds between $200 and $700 or more to the project cost. Longer wiring runs, limited attic access, or complex wall construction can increase labor time and material costs.
Permit and Inspection Costs
Permit and inspection costs for new electrical wiring often range from $50 to $300, depending on local building codes and permit requirements.
In many areas, licensed electricians handle the permit process as part of the installation service.
Factors That Affect Total Cost
Several factors can affect the total ceiling fan installation cost when no wiring exists.
Common pricing factors include:
- Ceiling height
- Wiring accessibility
- Fan size and weight
- Electrical panel upgrades
- Drywall repair needs
- Local electrician labor rates
Complex installations with high ceilings or older electrical systems are usually more expensive.
DIY vs Hiring an Electrician
Some homeowners install ceiling fans themselves to save money, while others hire licensed electricians for safety, convenience, and professional wiring. The right choice usually depends on the installation difficulty and your level of electrical experience.
Benefits of DIY Installation
DIY ceiling fan installation can help reduce labor costs for simple projects where existing wiring is already available. Replacing an old fan or light fixture in the same location is usually easier than installing completely new wiring.
Many homeowners choose DIY installation for:
- Simple fan replacements
- Basic wiring setups
- Standard ceiling heights
- Existing electrical boxes
DIY installation may also give homeowners more flexibility with scheduling and project timing.
Risks of DIY Electrical Work
DIY electrical mistakes can create serious safety hazards if the fan is wired or mounted incorrectly.
Common risks include:
- Electrical shock
- Fire hazards
- Damaged wiring
- Loose electrical connections
- Unsafe fan mounting
- Ceiling damage
Improperly installed ceiling fans may also wobble, stop working correctly, or overload electrical circuits.
Advantages of Professional Installation
Professional electricians help ensure the ceiling fan is installed safely, securely, and according to local electrical codes.
Benefits of professional installation include:
- Safer electrical wiring
- Proper fan mounting
- Code-compliant installation
- Faster project completion
- Professional troubleshooting
- Reduced safety risks
Electricians can also identify hidden wiring problems or outdated electrical components before they become larger issues.
When Professional Help Is Recommended
Professional installation is usually recommended for projects involving new electrical wiring or difficult installation conditions.
Hiring an electrician is often the safer choice for:
- New wiring installations
- Older homes with outdated wiring
- High or vaulted ceilings
- Complex electrical systems
- Electrical panel upgrades
- Limited attic access
For many homeowners, professional installation provides peace of mind and helps avoid costly wiring mistakes.
Final Thoughts
Installing a ceiling fan without existing wiring is possible with proper planning, safe wiring methods, and the correct electrical components. The project usually involves running new wiring, installing a fan-rated electrical box, and securely mounting the fan.
While experienced homeowners may handle simple installations, projects involving new circuits, difficult wiring access, or older electrical systems are often safer for licensed electricians.
A properly installed ceiling fan can improve airflow, increase comfort, and help lower cooling costs for years to come.